In this guide, I’ll show you how to build a data-driven organizational chart based on Google Sheets data, using Apps Script and the OrgChart JavaScript library.
Recently, I used Gemini Deep Reacher to “find the most popular or useful Google Apps Script tutorials?”. There was no mention of AppsScriptPulse (rude, but if you are curious, here is the report :), but it did introduce me to the work of Joseph Petty on the GreenFlux Blog.
One tutorial, in particular, stood out for its practical application for many organisations: “Building A Data-Driven Organisational Chart In Apps Script”.
Creating diagrams, particularly organisational charts, often requires laborious design work and manual revisions. Petty’s tutorial directly addresses this common frustration by demonstrating how Google Sheets, Apps Script, and the OrgChart JavaScript library can produce dynamic, data-driven organisational charts that automatically stay current.
The Core Idea: From Spreadsheet Data to Visual Chart
The beauty of this approach lies in its simplicity and efficiency. Most organisations already maintain employee data, including supervisor information, in spreadsheets or databases. Petty’s method cleverly taps into this existing data source.
The tutorial guides you through several key steps:
Foundation Setup: Deploy a basic Apps Script web app, creating an index.html for the frontend and Code.gs for server-side logic (including a doGet() function).
OrgChart Library Integration: Introduce the open-source OrgChart JavaScript library, which uses a nested JSON structure to define the visual hierarchy.
Data Transformation: Write an Apps Script function (getEmployeeData) to pull data from Google Sheets (employee IDs, names, titles, supervisor IDs) and convert it into the required nested JSON format for the chart.
Dynamic Connection: Pass the generated JSON data from Code.gs to the OrgChart library in index.html using google.script.run.withSuccessHandler() to render the chart.
The Result? An Always Up-to-Date Org Chart
By following these steps, you can create an organisational chart that’s directly linked to your Google Sheet. When an employee changes roles, or a new team member joins, simply update the spreadsheet, and your web app will reflect these changes automatically. No more manual graphic updates!
For the complete code and detailed setup instructions, please follow the link to the original tutorial on GreenFlux Blog.
[Update 2025-05-16: A great tip from Pablo Felip Monferrer: “might be worth mentioning that the good old Sheets has a native organizational chart that can be easily published, too (hint: employee names in a third column can be displayed as tooltips)”.
Storing JSON files in Google Drive offers a practical approach for Google Workspace developers, especially when combined with Google Apps Script. While Drive lacks a built-in JSON editor, AI tools like Gemini can rapidly prototype solutions, such as web-based editors. However, creating a robust application requires more than just a quick fix. It involves understanding syntax highlighting, managing dependencies, and navigating the constraints of the Apps Script platform, highlighting the importance of both rapid prototyping and robust engineering skills.
I recently explored how to effectively manage JSON configuration files within Google Drive using Google Apps Script, and the journey from quick AI-assisted prototypes to robust solutions.
As part of this I delve into the benefits of storing JSON in Drive, the challenges of editing, and how AI tools like Gemini can provide a great starting point. However, as I discovered, building a truly polished tool requires deeper technical knowledge and problem-solving.
Check out the article for insights on navigating the development process and, if you want one, an Apps Script powered JSON Editor for Google Drive.
Use Gemini and Imagen 3 on Vertex AI to create the images you envision. Generate tailored images from reference sources with Apps Script.
Have you ever generated an image using Gemini in Google Workspace and wished you could easily tweak or iterate on it? While Gemini for Workspace is great for initial creation, iterating on those images directly isn’t currently straightforward. A recent post by Stéphane Giron highlights a programmatic approach using Google Apps Script, Vertex AI (with Imagen 3 and Gemini models) to achieve the goal of generating image variations based on a source image.
Stéphane’s method uses a source image (which could be one previously generated or found elsewhere) which is provided to the Vertex AI API for Gemini (e.g., gemini-2.0-pro) along with text instructions for the required changes. The Gemini model analyzes the image and the request to generate a new prompt. This new prompt is then used with the Imagen 3 model (e.g., imagen-3.0-generate-001) via Vertex AI to generate the final image variation.
It’s interesting to contrast this with another solution we’ve previously featured from Kanshi Tanaike on ‘Iterative Image Generation with the Gemini API and Google Apps Script‘. While Tanaike’s method uses the Gemini API’s chat history to iteratively build an image from sequential text prompts, Stéphane’s focuses on reinterpreting a source image with specific modifications via a newly generated prompt.
You can check out Stéphane Giron’s source post for the complete code and setup instructions.
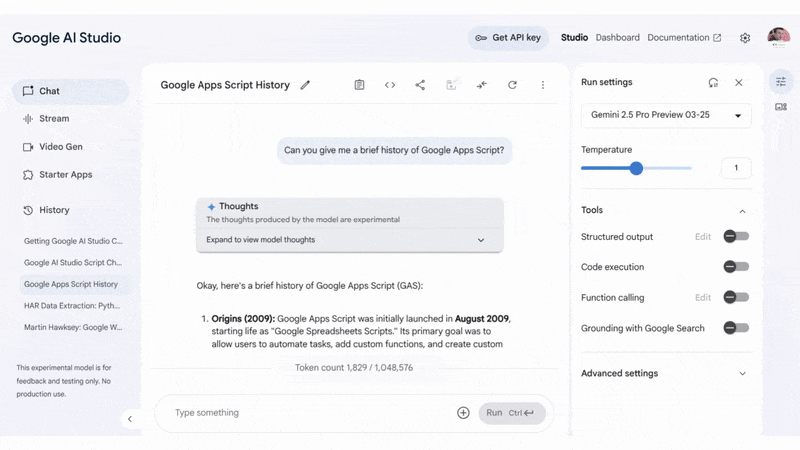
Getting started with generative AI in your Google Apps Script projects just got a whole lot easier! Google AI Studio has introduced a handy new feature allowing you to directly export your AI interactions as ready-to-use Apps Script code. If you’re new to Apps Script or integrating AI, this is a fantastic way to quickly add powerful features to your automations. Here’s how you can grab the code:
Click the Get code icon (</>) above the chat prompt.
In the ‘Get code’ window, click the language dropdown (this might initially show ‘Python’).
Select Apps Script from the dropdown list.
Click the Copy button to copy the generated Apps Script code to your clipboard.
If you are using AI Studio with your enterprise data, make sure you’re using a billable account so that your data is protected. This addition is perfect for rapid prototyping and understanding the basic API interaction. However, for applications needing more features essential for production environments, including robust error handling like exponential back-off, then you might want to look at my open source GeminiApp library.
Learn how to automatically maintain consistent formatting, styles, and date formats when new Google Form responses are added to your Google Sheets.
Tired of Google Form responses messing up your carefully formatted Google Sheets? When new submissions come in, they often ignore the styles you’ve set, resulting in inconsistent looking data. Amit Agarwal, has created a guide that uses Google Apps Script to automatically maintain consistent formatting when new responses are added.
Google Forms does not apply any formatting when it adds new response data to a Google Sheet; this means that custom fonts, alignments, and date formats can be lost. Amit’s solution uses Google Apps Script to copy the formatting from the previous row to the new row, ensuring all data has a consistent look. The Apps Script runs automatically when a new form is submitted and identifies the new row and copies the formatting from the row above.
The guide provides a complete script with instructions for adding it to your Google Sheet and setting up a trigger. The script uses the copyFormatToRange method, which is designed specifically for copying only formatting between ranges. If you want to make sure your Google Sheet stays neatly formatted, check out Amit’s full guide to learn how to set up this handy automation for yourself.
Google Apps Script to check that a date submitted via a Google Form is both in the future and falls on a Wednesday.
Google Form question asking for a date to be entered
The following Google Apps Script is designed to check that a date submitted via a Google Form is both in the future and falls on a Wednesday. This was developed as part of a newsletter submission process to help validate information and inform a user when they had not followed the instructions. It has been developed for UK dates and may need adjusting for your own time zone.
I use Google Apps Script to support staff and students in my job. I enjoy dabbling with creating tools to help with automation and I freely share my learning experiences on my blog, where I also have a number of useful Google Add-ons: www.pbainbridge.co.uk
Are you overwhelmed by a cluttered inbox? If you’re a power Gmail user, you may already know about the plus addressing feature that allows you to create custom email variations by appending a + and a label to your email address. For example, username+shopping@gmail.
Are you tired of sifting through a mountain of emails every day? Gmail’s “plus addressing” feature can be a lifesaver, and with a little Google Apps Script magic, you can transform it into a powerful automation solution.
If you are not familiar ‘plus addressing’ is a feature of Gmail which allows you to create custom variations of your email address by adding a “+” symbol and a label after your username, but before the “@” symbol. For instance, if your email is [email protected], you can use [email protected] for newsletters. While these emails still land in your main inbox, this subtle tweak opens the door to some clever automations using Google Apps Script.
This blog post, written by Senior Product Designer Niyas V, provides a step-by-step guide on using Google Apps Script to automatically label and archive emails based on the “plus addressing” variations. The script scans incoming emails, extracts the label after the “+”, applies the corresponding Gmail label, and then neatly archives the thread. The post includes the complete script, instructions on setting up a time-driven trigger for automation, and clear steps to save, authorise, and test your creation.
This tutorial is a fantastic resource for developers looking to learn practical Gmail automation using Google Apps Script and a great starting point if you are thinking about building other solutions using your inbox.
When working with Google Sheets, you often use formulas like IMPORTRANGE to transfer data between files. However, IMPORTRANGE is not always reliable, especially when files become too large and you see the message “The file is too large.” In such cases, switching to a Google Apps Script-based solution that uses CSV files for data export and import is more efficient and flexible.
Here’s how you can create a system to export data from a Google Sheet to a CSV file and then import it into another sheet.
Export Data Script
This script exports data from a sheet named YOUR_TAB_NAME to a CSV file saved in Google Drive.
function exportToCSV() {
const SheetName = "YOUR_TAB_NAME";
const NameFile = "YOUR_FILE_NAME";
const ss = SpreadsheetApp.getActive();
const sourceSheet = ss.getSheetByName(SheetName);
// Get the values as displayed in the sheet
const dataValues = sourceSheet.getDataRange().getDisplayValues();
// Creating CSV content
const csvContent = dataValues.map(row => row.join(";")).join("\n");
// Check if there is data
if(csvContent == "") return;
try {
const fileId = DriveApp.getFilesByName(NameFile + ".csv").next().getId();
DriveApp.getFileById(fileId).setContent(csvContent);
} catch {
DriveApp.createFile(NameFile + ".csv", csvContent, MimeType.CSV);
}
}
How It Works
Fetches data from the specified sheet (YOUR_TAB_NAME).
Creates CSV content, joining data with the ; separator.
Updates the CSV file if it already exists or creates a new one.
Import Data Script
This script imports data from a CSV file into a Google Sheet named YOUR_TAB_NAME.
function importFromCSV() {
  const SheetName = "YOUR_TAB_NAME";
  const NameFile = "YOUR_FILE_NAME";
  const Separator = ";"; // Change your separator if needed

  const destinationSheet = SpreadsheetApp.getActive().getSheetByName(SheetName);

  let fileId;

  try {
    // Search for the file and get its ID
    fileId = DriveApp.getFilesByName(NameFile + ".csv").next().getId();
  } catch {
    Logger.log("Il file '" + NameFile + ".csv' non è stato trovato in Google Drive.");
    return;
  }

  const file = DriveApp.getFileById(fileId);
  const property = PropertiesService.getDocumentProperties();

  // Check if the last imported data has already been loaded
  const lastModified = property.getProperty("lastModified");

  const timeStamp = file.getLastUpdated().toUTCString();
  property.setProperty("lastModified", timeStamp);

  if (lastModified == timeStamp) return;

  // Retrieve the CSV content
  const csvContent = file.getBlob().getDataAsString();

  // Split the content into rows and then into columns using the specified separator
  const data = csvContent
          .split("\n") // Split into rows
              .map(row => row.split(Separator)); // Split each row into columns using the specified separator

  destinationSheet.clearContents();
  destinationSheet.getRange(1, 1, data.length, data[0].length).setValues(data);
}
How It Works
Finds the CSV file in Google Drive.
Checks for changes by comparing the file’s last modification time with a stored property value.
Reads data from the CSV file and imports it into the sheet, clearing existing data first.
Automation with Triggers
To automate the import process, you can use a time-based trigger to run the script at regular intervals (e.g., every minute, hour, etc.).
Setting Up a Trigger
Go to Apps Script Editor (Extensions > Apps Script).
Click on Triggers (Clock icon) or Tools > Triggers in the editor.
Create a new trigger:
Choose the importFromCSV function.
Select “Time-driven trigger.”
Specify the frequency (e.g., every minute).
With this trigger, your script will regularly check for updates in the CSV file and automatically import new data.
Explanation of the Separator Usage
Why the semicolon (;) is used: Descriptions or text fields may already use commas (,), and using them as a separator could lead to incorrect data splits. Using semicolons avoids this issue.
Alternative separator: If semicolons (;) are also present in the data, it’s recommended to use a unique symbol, such as §.
To update the separator, replace “;” with “§” in the following line:
.map(row => row.split("§"));// Update the separator here
This makes the script adaptable to various data scenarios.
Why Use This Method?
Advantages
Avoid IMPORTRANGE Limits: No errors related to overly large files.
Efficiency: Data is transferred as CSV, reducing connectivity issues between files.
Automation: Imports happen without manual intervention.
Limitations
Maintenance: Scripts need to be managed and updated manually if changes occur.
Security: Ensure file and script access is secure.
With these scripts and a configured trigger, you can reliably and efficiently handle large volumes of data between Google Sheets. If you need further customizations or help setting it up, feel free to ask!
Exponential Backoff, a process by which when something fails you try again a set number of times whilst increasing the delay between each attempt.
Sample Apps Script code for Exponential Backoff
The following Google Apps Script is designed to explore Exponential Backoff – a process by which when something fails you try again a set number of times whilst increasing the delay between each attempt, up to a certain point.
I needed this for a tool I built which adds Guests to a Calendar event from a Google Form submission. Whilst I was using ScriptLock to prevent simultaneous submissions, the code ran so fast that it would infrequently trip the Calendar API with the following error message “API call to calendar.events.patch failed with error: Rate Limit Exceeded”.
By infrequently I mean a reported issue only once in 3,500 submissions over the course of 12 months. Enough however to take the opportunity to learn about Exponential Backoff and to squash that single instance.
I use Google Apps Script to support staff and students in my job. I enjoy dabbling with creating tools to help with automation and I freely share my learning experiences on my blog, where I also have a number of useful Google Add-ons: www.pbainbridge.co.uk
Bluesky is gaining traction this end of 2024, and if you’re on the platform, you need to know your numbers. Want to track your Bluesky stats without the hassle? Google Apps Script and Google Sheets are here to rescue you with a simple, yet powerful solution.
In this blog post, Stéphane Giron provides a guide to tracking Bluesky social media statistics using Google Apps Script and Google Sheets. With the growing popularity of Bluesky it can be useful and interesting to understand the social media dynamic of the platform.
The script he offers tracks metrics such as the number of posts, followers, likes, reposts, and more. Stéphane also details how to install and set up the script, including copying and pasting the provided code, running initialization functions, and scheduling automatic data collection. The result is raw data that users can then use to create graphs and visualize their Bluesky activity over time.